WooCommerce is a free plugin that turns a WordPress site into an online store. On Domain India cPanel hosting you install WordPress first, then add WooCommerce from inside WordPress, then configure payments, shipping and tax. This guide walks through each step and the few hosting settings that matter for a shop.
Point your domain at your hosting and let the free SSL certificate issue, then install WordPress from Softaculous or WP Toolkit in cPanel. In WordPress, go to Plugins › Add New, install and activate WooCommerce by Automattic, and complete its setup screens. Add an Indian payment gateway plugin or cash on delivery, set shipping zones and tax, and place real test orders before you launch.
1. Before you start
A store handles addresses and payments, so it must run on https:// from day one. Check these three things first:
- An active hosting account. Sign in to the client area and open My Hosting. The cPanel button on your domain's row signs you into your control panel.
- Your domain pointing at the hosting. WordPress runs at your domain, so the domain must already reach our server. See how do I change my nameservers.
- A working SSL certificate. On our cPanel servers, AutoSSL issues a free Let's Encrypt certificate once the domain points at the server. Open
https://yourdomain.comand check for the padlock before you install anything.
If public_html already holds a website, take a copy of its files and export its database first. Installing WordPress into the same folder can overwrite files such as index.php and .htaccess.
2. Install WordPress
Our cPanel servers have two one-click installers, Softaculous and WP Toolkit. Either one creates the database and the WordPress files in a single form.
- Open the installer.In cPanel, open Softaculous Apps Installer and choose WordPress, or open WP Toolkit and click Install.
- Choose where it goes.Select your domain with
https://. Leave the directory empty to install atyourdomain.com, or type a folder name such asshopto install atyourdomain.com/shop. - Set the site details.Enter the store name, an admin username that is not
admin, a strong password and an email address you actually read, because password resets and order notices go there. - Install.When the installer finishes, it shows the site address and the admin login address,
https://yourdomain.com/wp-admin.
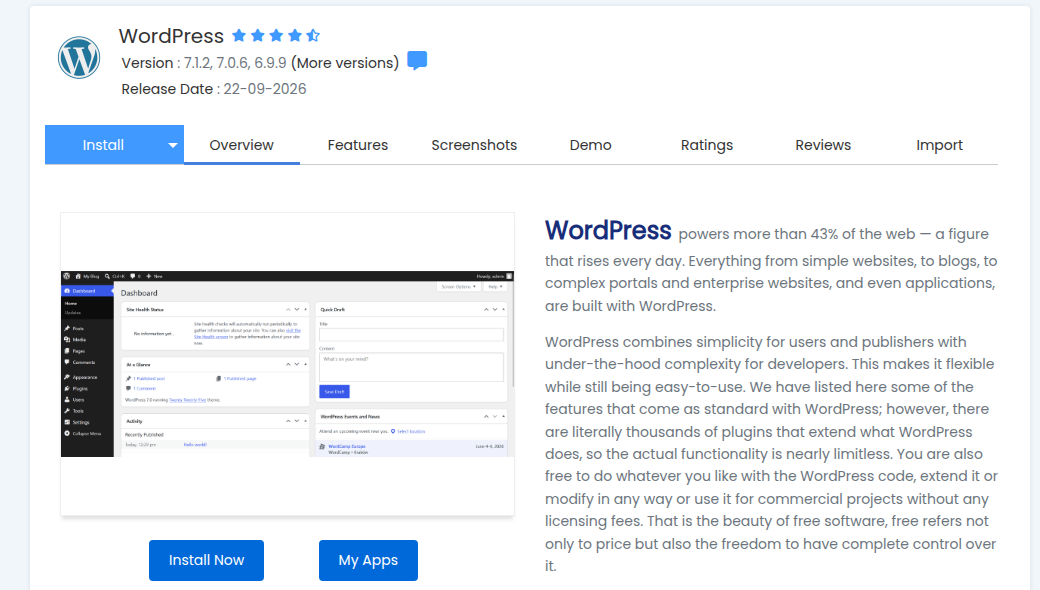
If you prefer to install WordPress by hand, or the installer fails, follow how to install WordPress the do-it-yourself way. Before you continue, set a recent PHP version that WooCommerce supports; you can pick one per account in cPanel's MultiPHP Manager. WooCommerce lists its current PHP and MySQL recommendations on its website.
3. Install and activate WooCommerce
- Log in to WordPressat
https://yourdomain.com/wp-admin. - Add the plugin.Go to Plugins › Add New, search for WooCommerce, and choose the plugin by Automattic. Other plugins with similar names are add-ons, not WooCommerce itself.
- Install and activate.Click Install Now, then Activate.
- Answer the setup questions.WooCommerce asks about your store: its address in India, your industry and what you plan to sell. Set the currency to Indian rupee (₹).
- Skip extras you don't need.The setup offers free extensions and services. Install only what you will use; every plugin adds weight and something else to update.
WooCommerce creates the Shop, Cart, Checkout and My Account pages for you. Leave them in place; the checkout will not work without them.
4. Configure payments, shipping and tax
All of this lives under WooCommerce › Settings.
Most payment gateways ask to see your privacy, terms, shipping and refund policy pages before they approve your account, so publish those pages early and link them in your footer.
5. Add your first products
Go to Products › Add New. Enter a name, a description in your own words, a price and a main image, and choose a category.
- Simple product: one item with one price, such as a book.
- Variable product: one design in several sizes or colours, each with its own price, stock and photo. Create the attributes once under Products › Attributes so every product can reuse them.
- Stock: turn on stock management under Settings › Products › Inventory so sold-out items can't be ordered.
For a worked example with sizes, colours and size charts, see creating a garments store with WooCommerce.
6. Order emails on shared hosting
WooCommerce sends an email for every new order, so check that email works before you launch.
- WordPress sends mail through PHP
mail(). On our cPanel servers, the socket functions that SMTP plugins need are disabled, so most "send via SMTP" mail plugins fail. Read PHP sendmail settings and PHP disabled functions on shared hosting before you install a mail plugin. - Send from an address on your own domain, such as
[email protected], and publish SPF, DKIM and DMARC records so order emails don't land in spam. - Each cPanel account can send 200 messages per hour. That covers order confirmations for a small store; send newsletters through an email marketing service instead.
7. Speed, caching and scheduled tasks
Our shared hosting runs the Apache web server, so don't install LiteSpeed Cache: it needs a LiteSpeed server. Use a cache plugin that works with Apache, such as WP Super Cache or W3 Total Cache, and make sure the Cart, Checkout and My Account pages are never cached.
On our cPanel servers, nginx sits in front of Apache and caches pages for up to 120 minutes. Logged-in WordPress users bypass that cache, and WooCommerce marks its cart, checkout and account pages as not cacheable. If a guest still sees an old price or product after you change it, add ?t=1 to the address to see the live version, and open a ticket if the old page persists.
WooCommerce also runs background jobs, such as cancelling unpaid orders and sending follow-up emails, through WP-Cron. WP-Cron only runs when someone visits the site, so on a quiet store it can lag. To run it on a schedule instead, add define( 'DISABLE_WP_CRON', true ); to wp-config.php and create a job in cPanel's Cron Jobs every 15 minutes:
/usr/local/bin/php /home/USERNAME/public_html/wp-cron.php >/dev/null 2>&1Replace USERNAME with your cPanel username, and adjust the path if WordPress is in a subfolder. More speed tips are in my website is slow.
8. Security, backups and launch checks
Keep WordPress, WooCommerce, your theme and every plugin updated, and delete plugins you don't use. Our shared servers run Imunify360 with its web application firewall and WordPress protection switched on, but that doesn't replace your own updates and strong passwords. The full checklist is in the complete WordPress hardening guide.
Every cPanel account is backed up weekly with JetBackup 5 (on Sunday, with 5 copies kept), and you can restore files or databases yourself; see backup and restore with JetBackup. Before a major WooCommerce update, still take your own copy of the files and database.
Place an order with each payment method, including cash on delivery, and refund one. Check that stock goes down, that you and the customer both receive the order emails, and that tax and totals are right. Test on a phone as well; most shoppers in India buy on mobile.
9. Which Domain India plan fits a WooCommerce store
Any of our cPanel plans runs WordPress and WooCommerce, with free SSL, MySQL databases, Softaculous, WP Toolkit and Imunify360. For a new store with one website, cPanel Starter is enough. Choose Growth if you plan more than one site or a large catalogue with many product photos.
- 25 GB NVMe SSD Storage
- 50 GB Monthly Bandwidth
- 1 Website
- 10 Email Accounts
- 50 GB NVMe SSD Storage
- 100 GB Monthly Bandwidth
- 5 Websites
- 50 Email Accounts
Prices on the cards are live and exclude 18% GST. On 19 September 2026, Domain India list prices were ₹125 a month for cPanel Starter and ₹200 a month for cPanel Growth. Most hosting accounts are created automatically within a couple of minutes of payment; a small number need a manual check and take longer.
Is WooCommerce free?
Yes. The WooCommerce plugin is free. You pay for hosting and a domain, and possibly for premium themes, paid extensions and the payment gateway's fee on each transaction.
Do I need to install WordPress before WooCommerce?
Yes. WooCommerce is a WordPress plugin. Install WordPress first with Softaculous or WP Toolkit in cPanel, then add WooCommerce from Plugins › Add New inside WordPress.
Which payment methods can I offer in India?
Cash on delivery is built into WooCommerce. For UPI, cards and net banking, install the WooCommerce plugin of an Indian gateway such as Razorpay, PayU, Cashfree or PhonePe after the gateway approves your account.
Can I use LiteSpeed Cache on Domain India shared hosting?
No. Domain India shared hosting runs the Apache web server, not LiteSpeed. Use a cache plugin such as WP Super Cache or W3 Total Cache, and keep the cart, checkout and my-account pages out of the cache.
Why are my WooCommerce order emails not arriving?
Most SMTP mail plugins fail on our cPanel servers because the PHP socket functions they need are disabled. Send through PHP mail() from an address on your own domain, publish SPF, DKIM and DMARC, and remember the limit of 200 messages per hour per cPanel account.
Are my store's files and orders backed up?
Yes. cPanel accounts are backed up weekly by JetBackup 5, every Sunday, with the last 5 copies kept, and you can restore files or databases from JetBackup in cPanel. Take your own backup before major updates too.
Ready to open your store? Choose a plan on cPanel hosting, register your domain, then follow the steps above. Stuck on a step? Open a support ticket or use the 24/7 live chat.
Softaculous, WP Toolkit, free SSL and weekly JetBackup backups, ready for WordPress and WooCommerce.
See cPanel plans